
This series of posts will walk you through the steps of building an Email-to-Lead process from scratch leveraging Email-to-Flow. If you are unfamiliar with Email-to-Flow, take a minute to review Introducing Email-To-Flow, a low-code Email Service.
This series of posts are iterative, layering in functionality piece by piece so you can fully understand (and enhance as required) the complete solution. If you not interested in build the Email-to-Lead piece by piece, no problem. The completed Email-to-Lead template is included in the package.
Let’s build an Email-to-Lead from Scratch (Part 1) – Email Ingestion
Let’s Build an Email-to-Lead from Scratch (Part 2) – Store the Email
Let’s Build an Email-to-Lead from Scratch (Part 3) – Email Threading
Let’s Build an Email-to-Lead from Scratch (Part 4) – Processing Attachments
Part 3 – Email Threading
Part 3 begins where Let’s Build an Email-to-Lead from Scratch (Part 2) left off.
In Part 3, we introduce email threading. If you are unfamiliar with the differences between Salesforce’s original Thread Id behavior and the new Email Header threading behavior, I recommend taking a minute to read Thread Id versus Email Header.
As you will notice in Thread Id versus Email Header, email threading behavior is baked into the Email-to-Case process. And if you wanted to create a custom email service, Salesforce also provided standard methods; getCaseIdFromEmailThreadId(emailThreadId) and getCaseIdFromEmailHeaders(headers) to perform the matching logic. Unfortunately, if you want to match anything other than Cases, you are on your own. But don’t fear. Email-to-Flow has you covered.
Add Get Lead, Contact, User id from Headers to your flow
Note: This assumes you have Opted In to Disable REF ID and Transition to New Email Threading Behavior. Don’t worry, we also offer a solution for anyone still using a thread id, but this tutorial uses the new threading behavior.
If you flow, add Apex Action E2F: Get Lead, Contact, User Id from Headers.
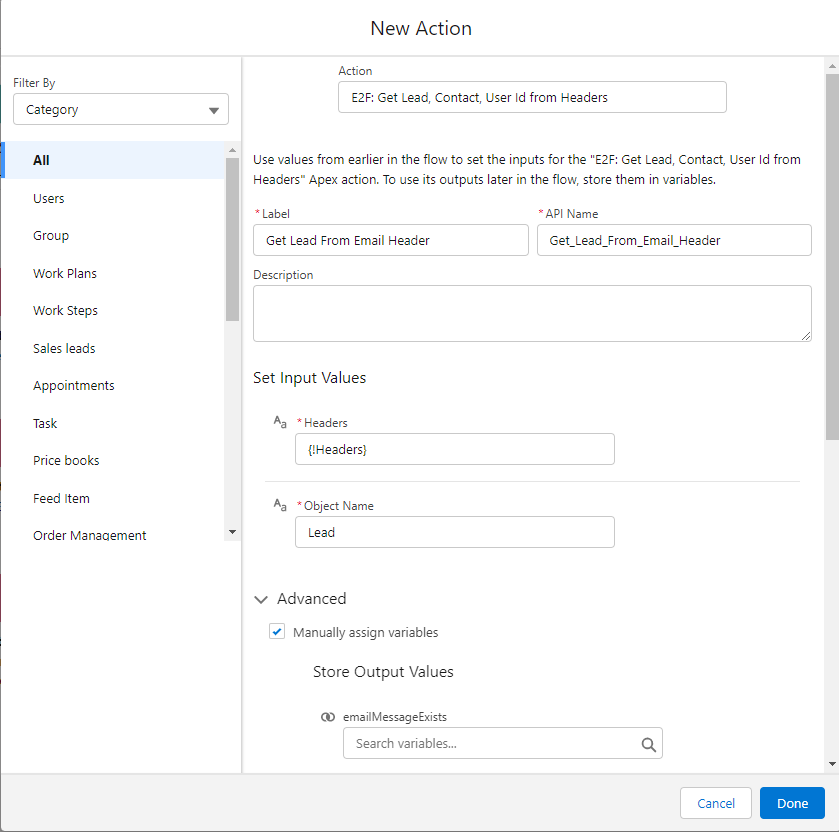
Set the {!leadIdFound} and {!leadIdCreated} variables.
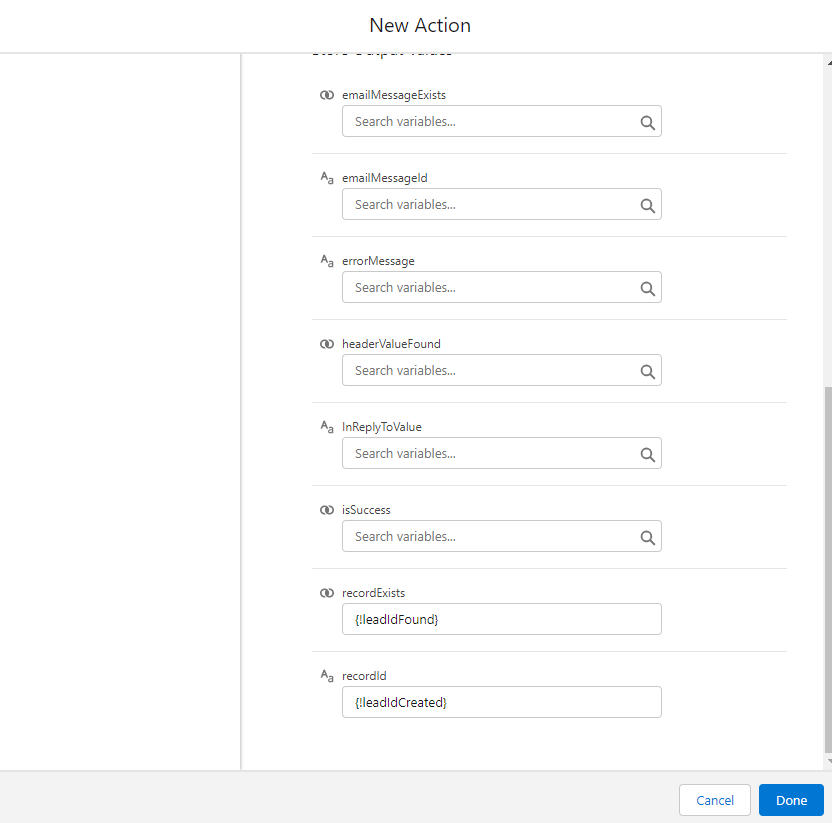
Note: For demo purposes, we are only setting two output variables. In your production implementation, please review the documentation and be aware of the other variables. They can be used to tie into your company’s fault process.
Add a Decision
The decision is evaluating whether the email can be linked to an existing lead or not.
Tie is all together
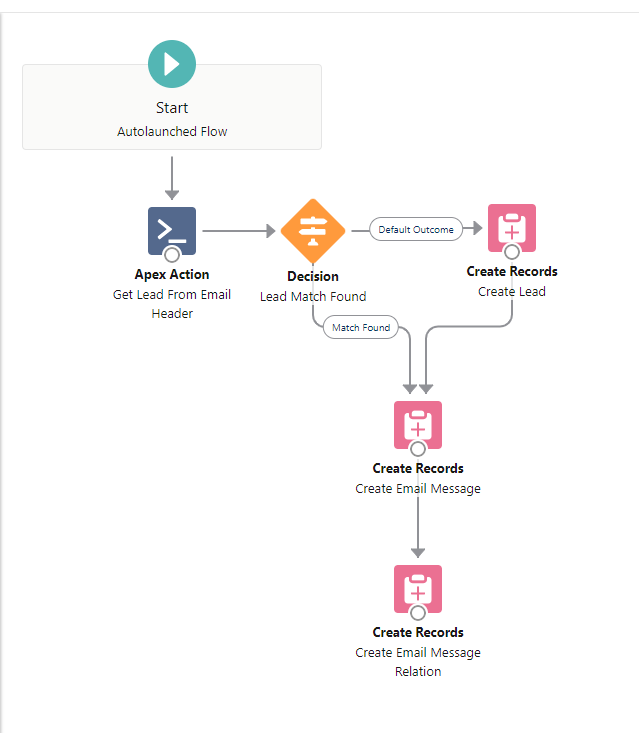
Your flow should look something like this. An email in ingested by the Email-to-Flow process and sent to the Email-to-Lead flow. An attempt is made to match the email to an existing lead via the email message header. If no match is found, a lead is created. If a match is found, the lead creation step is skipped. The process then continues to create the email message and email message relation records.
Save and active the new version of the flow.
Let’s Test
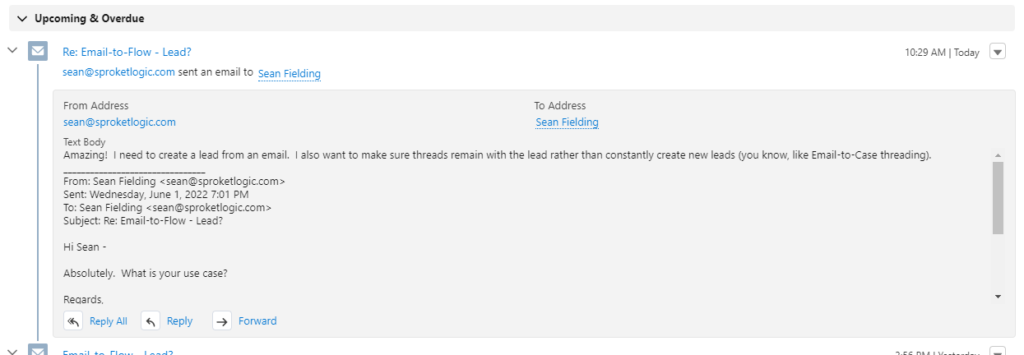
Let’s rerun the test that previously created a new lead.
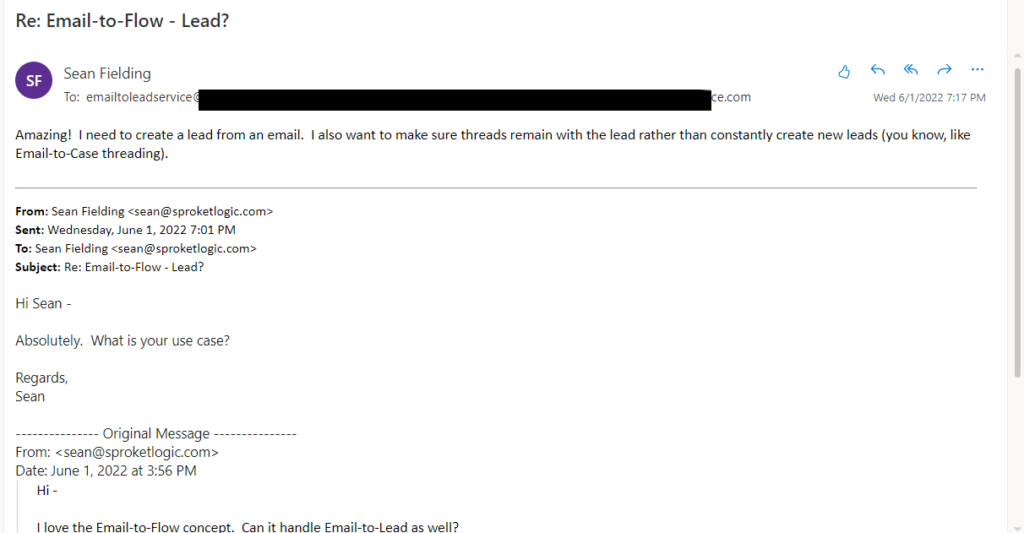
Sweet! It’s now linking correctly.
If we log back into the original lead, we can see the full thread that includes 3 email exchanges.
That’s it!
If you need a basic Email-to-Lead process, you are all set. You may want to enhance this process for your specific business logic. For example:
- Include your fault path logic
- populate addition fields on the lead
- execute some match logic on the email domain to identify the company value
- block outlook spam
If you want to enable email attachments, let’s proceed to Let’s Build an Email-to-Lead from Scratch (Part 4).