
This series of posts will walk you through the steps of building an Email-to-Lead process from scratch leveraging Email-to-Flow. If you are unfamiliar with Email-to-Flow, take a minute to review Introducing Email-To-Flow, a low-code Email Service.
This series of posts are iterative, layering in functionality piece by piece so you can fully understand (and enhance as required) the complete solution. If you not interested in build the Email-to-Lead piece by piece, no problem. The completed Email-to-Lead template is included in the package.
Let’s build an Email-to-Lead from Scratch (Part 1) – Email Ingestion
Let’s Build an Email-to-Lead from Scratch (Part 2) – Store the Email
Let’s Build an Email-to-Lead from Scratch (Part 3) – Email Threading
Let’s Build an Email-to-Lead from Scratch (Part 4) – Processing Attachments
Part 1 – Email ingestion
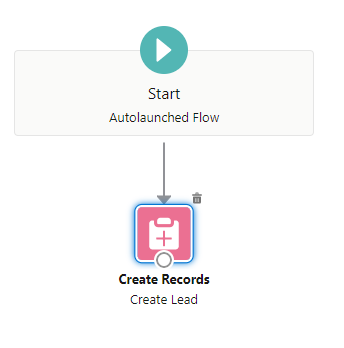
In Part 1, we start building the Email-to-Lead from scratch. The process begins with the ingestion of an email and ends with the creation of a new lead record.
Use Case
You company has a dedicated email address for inquires ([email protected]). To improve visibility and reporting, you company wants to automatically generate leads from these emails.
Ok, let’s get started.
Flow
Find the flow entitled Email-to-Case Template. Save As a new flow entitled Email-to-Lead Template. (Note: Keep all the email-to-case process in the flow but detached. It can come in handy as a reference).
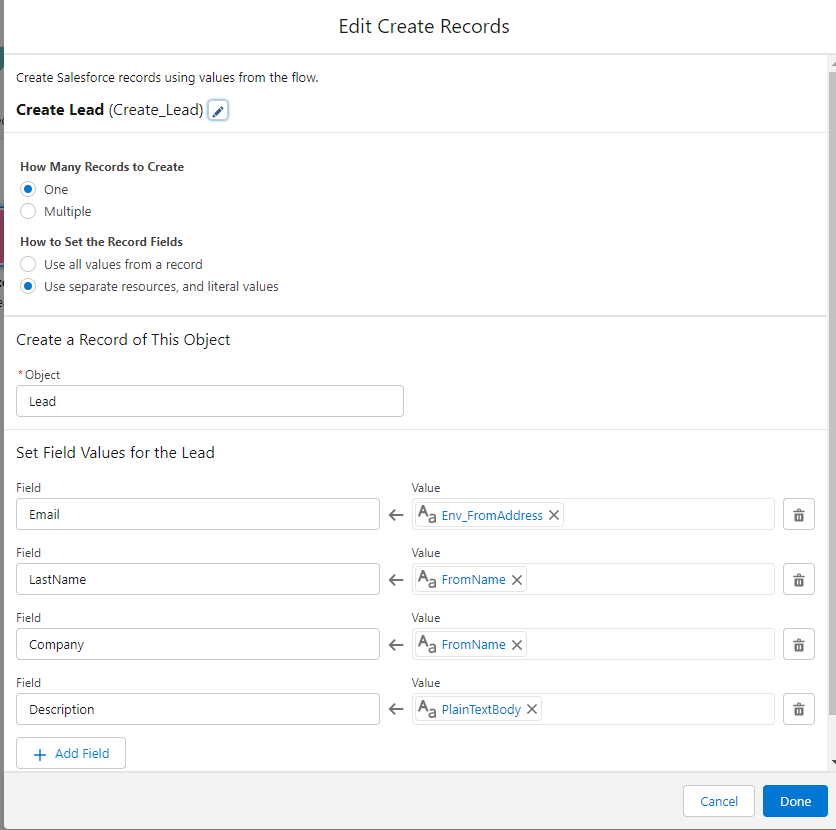
Since all the email service variables have been copied over from the Email-to-Case template, we only need to create a single Create Records action to create the lead.
For demo purposes, we will only be setting the email address, last name, company, and description on the new lead record. If you are just getting acquainted with Email-to-Flow, we highly recommend sticking to the basics first. You can layer in enhancements as needed later on.
Save and activate the flow.
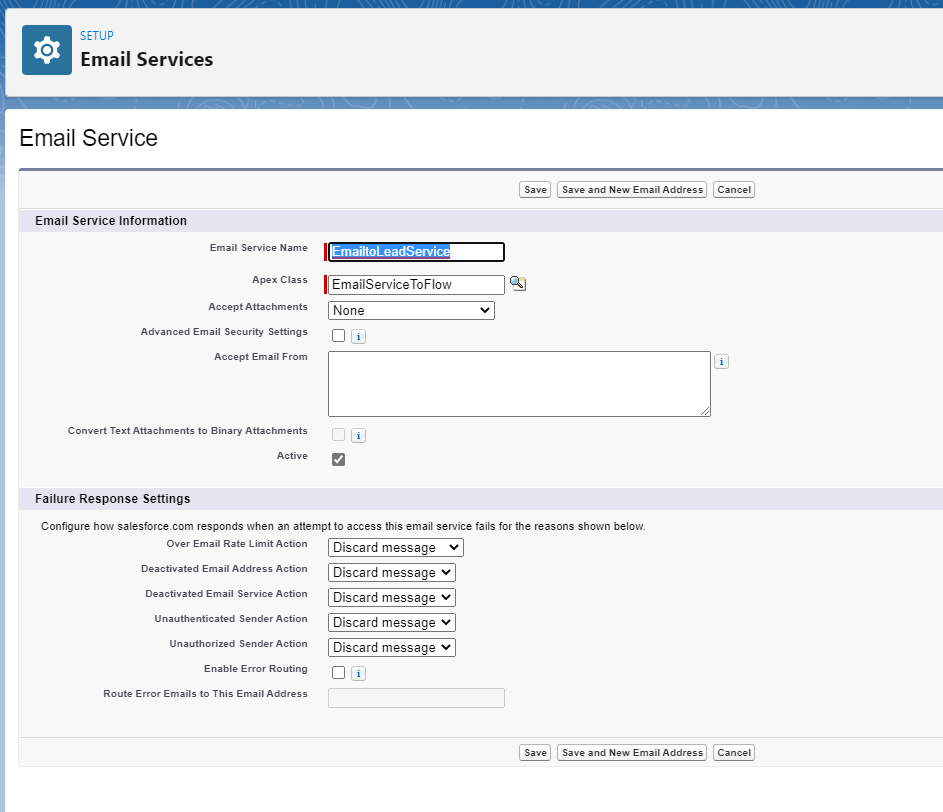
Set up Email Service
Create a new email service record. For now, leave accept attachments as None. We will come back to this setting in later steps.
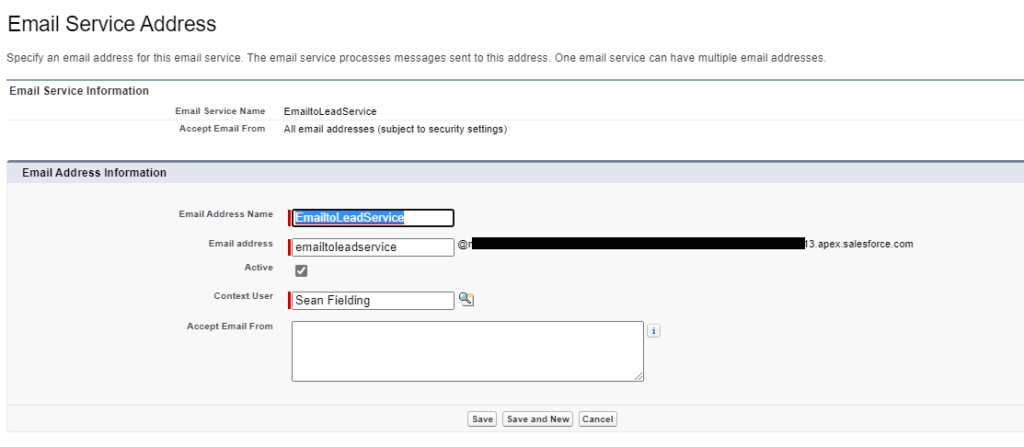
Generate a new email address for the email service. Copy the email address for further setup and eventual testing.
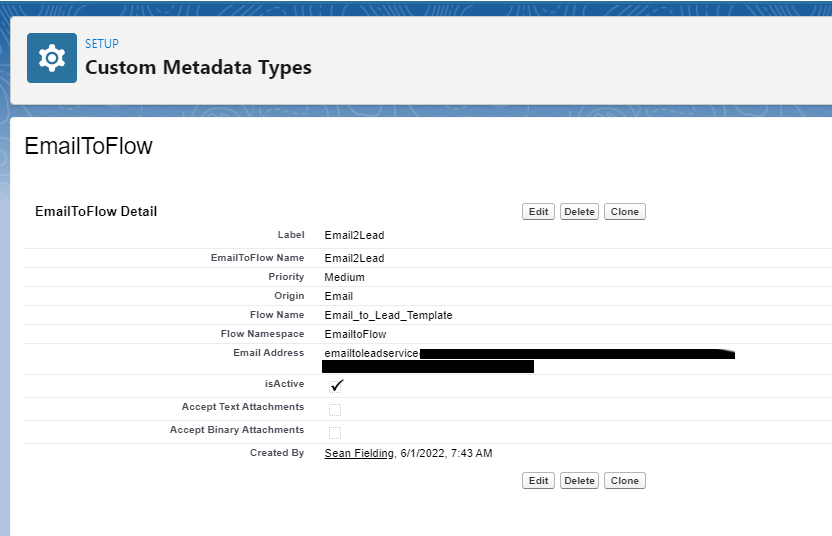
Create EmailtoFlow Custom Metadata Type Record
Create a new EmailtoFlow CMDT record for the Email2Lead. For now, leave accept text and binary attachments unchecked. Make sure the Flow Name references your newly created flow and the email address is the new email service email address. Note: In this instance, the flow is namespaced for Email-to-Flow. In your implementation, namespace will be blank.
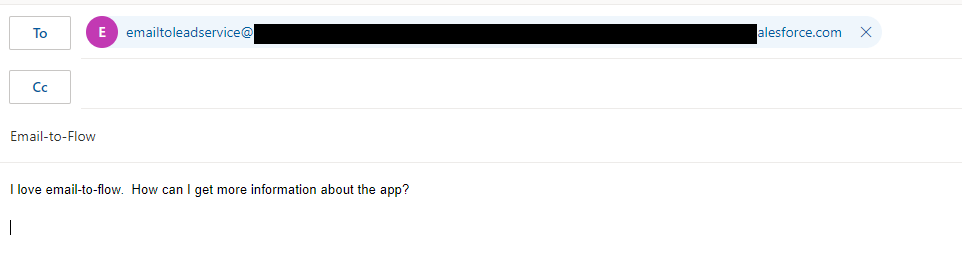
Let’s take it for a Spin
Let’s see what we have accomplished. Send an email to the email service email address.
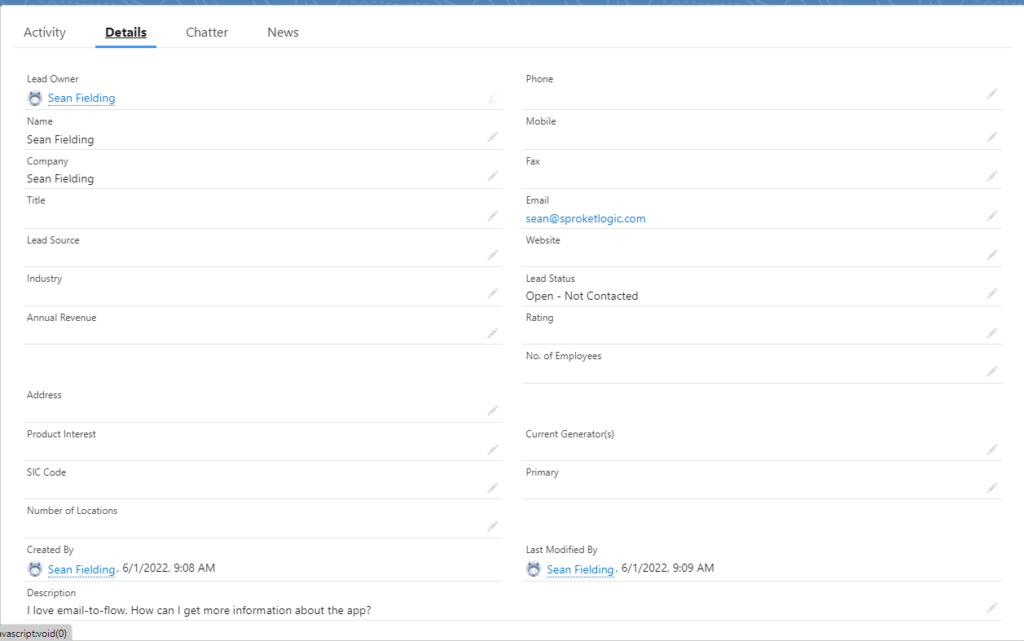
Review the Lead
Confirm that a new lead has been generated. As defined in the flow, the email address, last name, company, and description will be populated.
And that’s all there is to Part 1.
In Let’s Build an Email-to-Lead from Scratch (Part 2), we will store the email and link it to the lead.