
This series of posts will walk you through the steps of building an Email-to-Lead process from scratch leveraging Email-to-Flow. If you are unfamiliar with Email-to-Flow, take a minute to review Introducing Email-To-Flow, a low-code Email Service.
This series of posts are iterative, layering in functionality piece by piece so you can fully understand (and enhance as required) the complete solution. If you not interested in build the Email-to-Lead piece by piece, no problem. The completed Email-to-Lead template is included in the package.
Let’s build an Email-to-Lead from Scratch (Part 1) – Email Ingestion
Let’s Build an Email-to-Lead from Scratch (Part 2) – Store the Email
Let’s Build an Email-to-Lead from Scratch (Part 3) – Email Threading
Let’s Build an Email-to-Lead from Scratch (Part 4) – Processing Attachments
Part 2 – Store the Email
Part 2 begins where Let’s build an Email-to-Lead from Scratch (Part 1) left off.
In Part 2, we store the email and link it properly to the lead.
Store the Lead Id
Let’s go back to the Email-to-Lead Template flow that was created as part of Let’s build an Email-to-Lead from Scratch (Part 1).
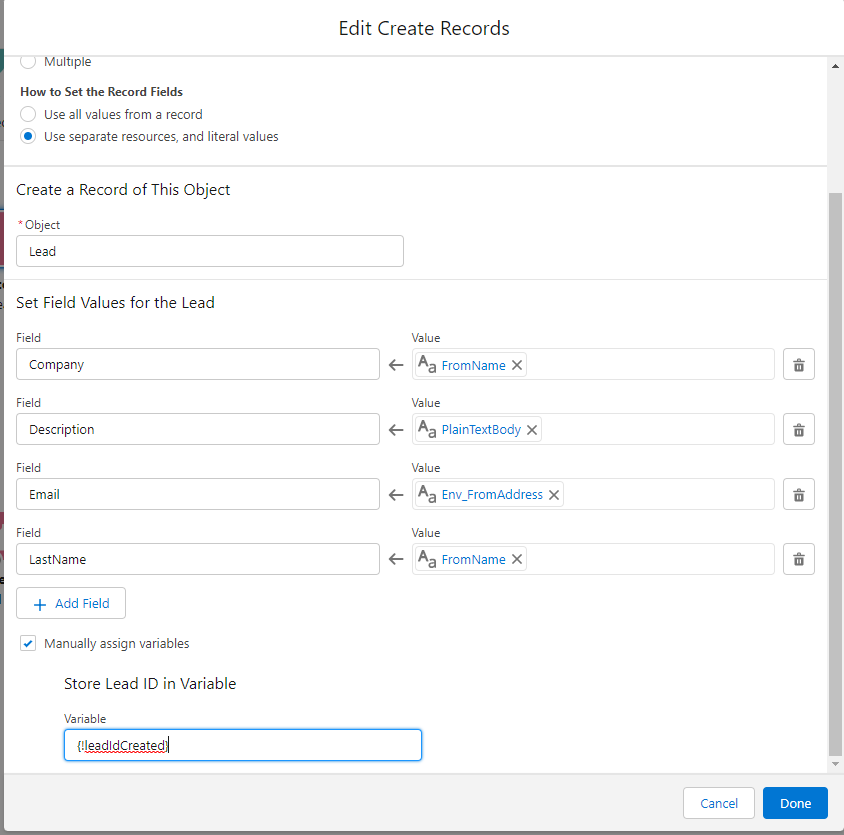
- On the Create Lead step, store the lead id that is created into a new variable named leadIdCreated.
Create an Email Message Record
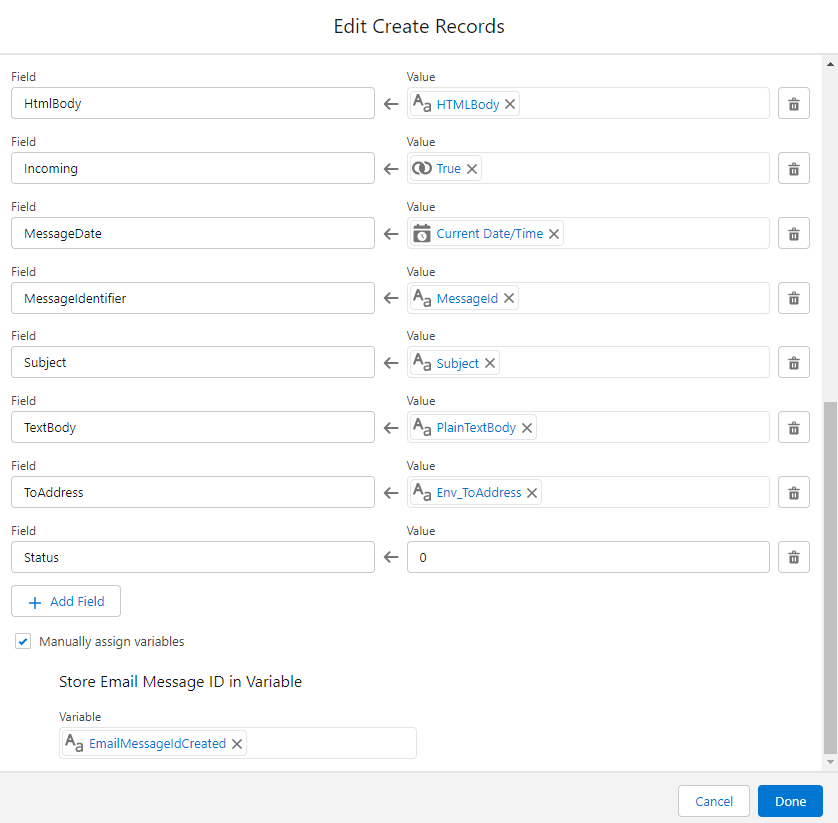
Now, create a new email message record. Hint: If you saved the process from the Email-to-Case template, simply pull that into the flow. Everything you need is defaulted.
- Remove the Parent Id field assignment (if reusing the step)
- Make sure you are saving the message id into the EmailMessageIdCreated variable.
- Set status to “0” (New).
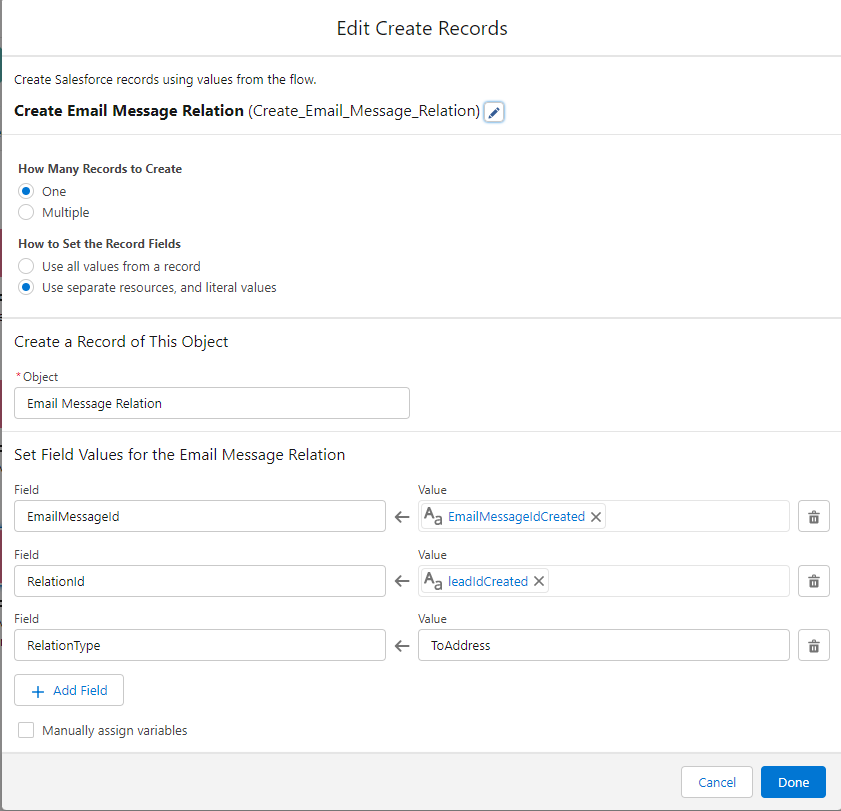
Create an Email Message Relation Record
Next, we need to create a relationship record that links the lead to the email message. Note: This is a unique requirement for emails that need to be linked to contacts, leads, and users.
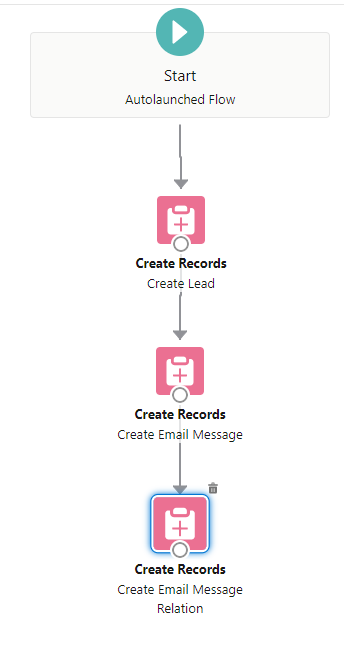
Save and Activate the Flow
Your flow should look a little something like the image below. Save the flow as a new version and activate it.
Test Your Process
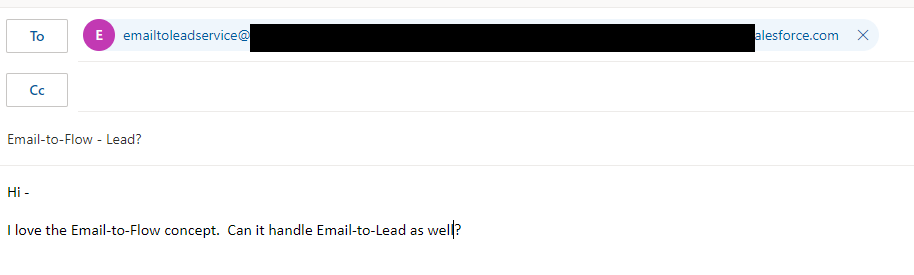
Now, let’s repeat the same email testing process and see what we end up with. Send an email to the email service.
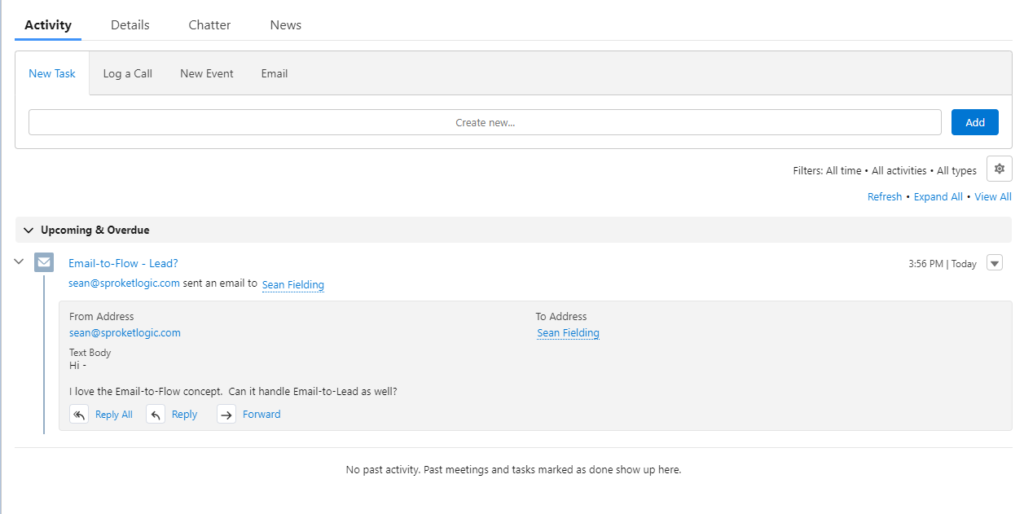
Confirm Test, Find your Newly Created Lead
As you can see, the Email-to-Lead process creates the link, stores the email, and links them for further processing.
Confirm Test, Reply to the Linked Email
As an additional test, choose Reply to reply to the email. Respond to the thread again from the client perspective.
Note: Make sure you simulate email forwarding (which would be handled by your email server setup in a production environment) by responding the email service email address.

Uh Oh!
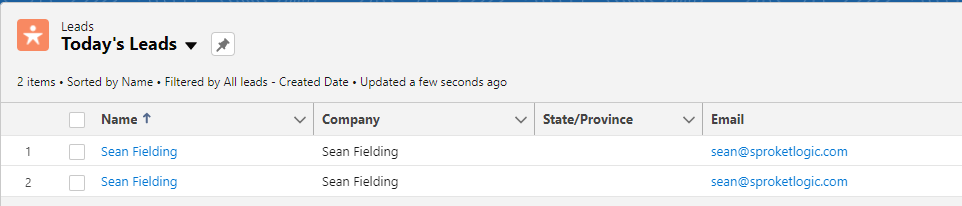
You will notice that a new lead was created (instead of linking to the existing lead). Don’t worry. This was expected. We haven’t implemented email threading yet.
In Let’s Build an Email-to-Lead from Scratch (Part 3), we will introduce email header threading.