This post will walk you through the steps to detect language leveraging Email-to-Flow. If you are unfamiliar with Email-to-Flow, take a minute to review Introducing Email-To-Flow, a low-code Email Service.
So, you want to detect the primary language within your email
So, you want to detect the primary language within and email… and create a case… and route it to the appropriate queue based on the detected language… AND you want to do it all within Flow?
No problem! Email-To-Flow has you covered.
Step 1: Install Email-to-Flow
Head on over to the AppExchange and install Email-to-Flow. Installation takes only a couple of minutes.
Step 2: Create a new Email Service
First up, you will need an email service and email address mapped to the delivered Email-to-Flow apex class.

Step 3: Create a new Flow from the Email-to-Case Template
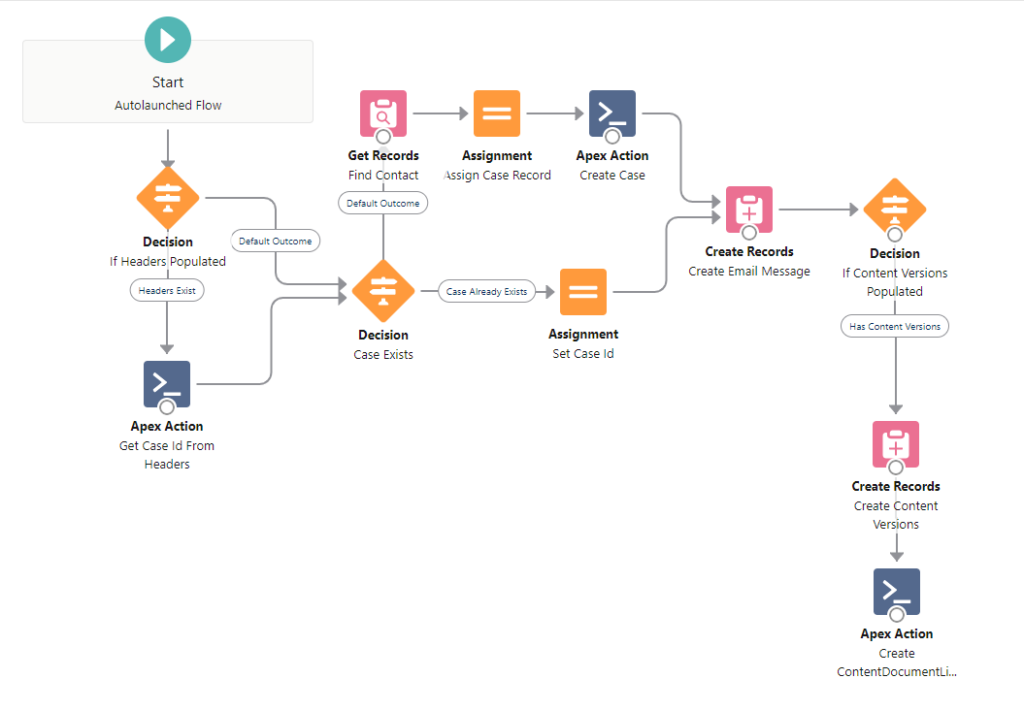
Email-to-Flow comes standard with a number of pre-built flows including our Email-to-Case template. The Email-to-Case template provide a flow based process that mimics all the iterations of the standard Email-to-Case process. Simply copy this flow and save it with a new name.

Step 4: Set up the CMDT
The delivered EmailToFlow Custom Metadata Type provides a simple mapping between the email service email address and the Flow to execute.

Step 5: Configure a Named Credential to allow interaction with the Google Translate APIs.
Salesforce has no standard language detection functionality. No problem. Google offers language detection functionality via it’s Google Translate APIs. Configurating the Named Credential and assigning it your Google API token is all you need to authenticate the transactions.

Step 6: Add Detect Language to the Flow
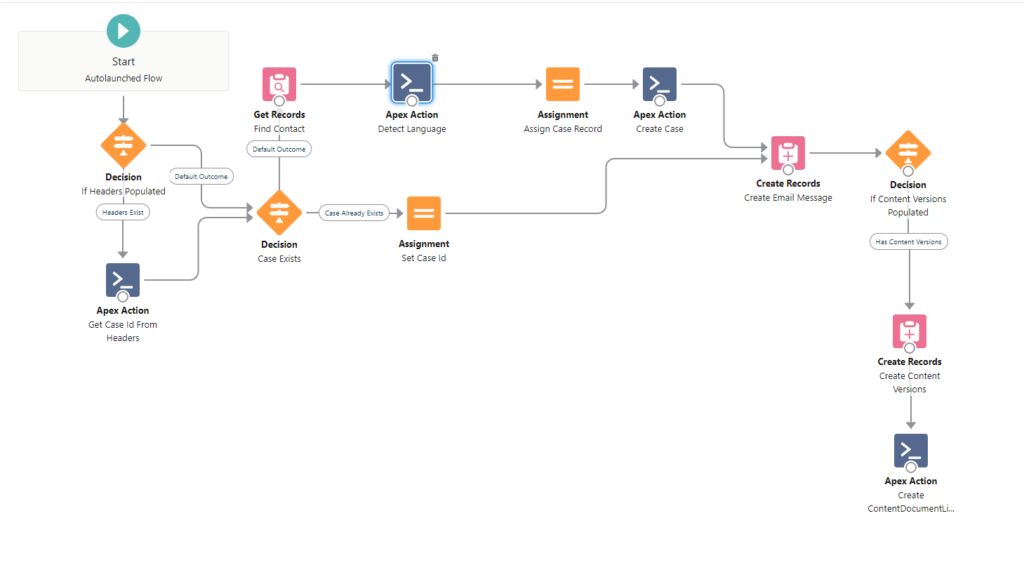
Now you are ready to modify you flow. Email-to-Flow comes delivered with the E2F: Detect Language Apex action. Simple add this apex action to determine the language prior to creating a case.

Configure the Apex action. The Apex action takes a text string as input and the detected language as output.

Finally, map the LanguageDetected variable set by the apex action to your custom case language detected field.

Save your flow.
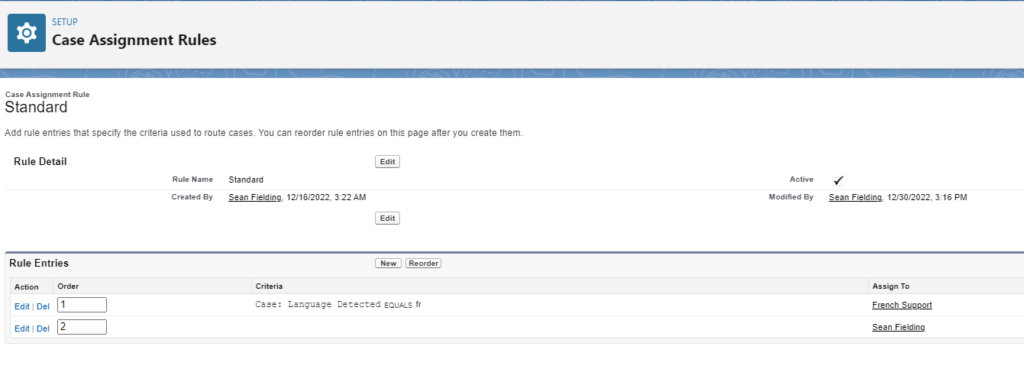
Step 7: Create Assignment Rules
Leverage the Case Language Detected field to perform assignments as needed.

Step 8: Enjoy
That’s all there.
Need more information?
Head on over to the Email-to-Flow AppExchange Listing, where you will find a link to the latest Customization Guide, which will walk through the above steps in much more detail.
