
What is a Connected App?
A connected app is a framework that enables external applications to integration with your Salesforce instance. A typical connected app implementation will allow integrate between external applications and the Salesforce APIs. In our use case, we are going to connect your Salesforce instance to… your Salesforce instance. You read that correctly. We are going to create a connected app to connect your Salesforce instance to your Salesforce instance’s APIs.
Why would we need Salesforce connected to itself?
First off, the Salesforce REST APIs exposes different objects that apex. Second, the Salesforce REST APIs have different restrictions than apex.
In our use case, we are leveraging the File Wipe component of Email-to-Flow. In order to audit email signatures and useless files, we may need query a large number of records. With standard apex, the “Total number of records retrieved by SOQL queries” is set at 50,000. However, leveraging the Query REST API, we can execute a full audit without worrying about the 50,000 record limit.
So, let’s get started. Let’s build a Connect App that allows File Wipe (a component of Email-to-Flow) to execute a Salesforce Rest API.
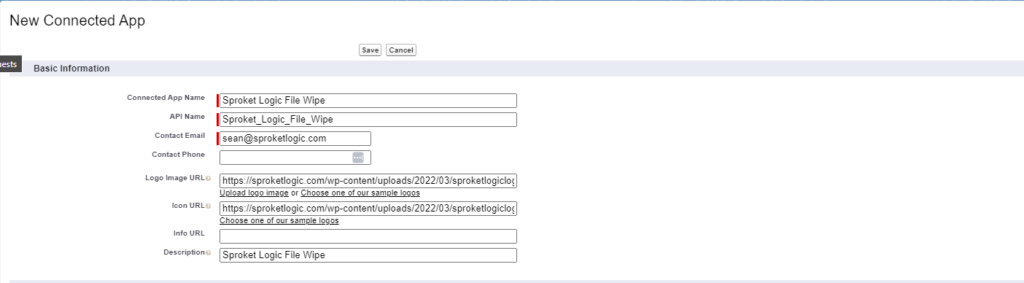
(1) Create a Connected App
First up, we need to create a Connected App.
- Navigate to App Manager
- Click on New Connected App
- Enter
- A Connected App Name
- API Name
- Contact Email
- A Description
- Check Enable OAuth Settings
- Enter
- Enter any URL for the Callback URL, we will update this in a future step
- Add OAuth Scopes as needed
- Leave all other fields as a default
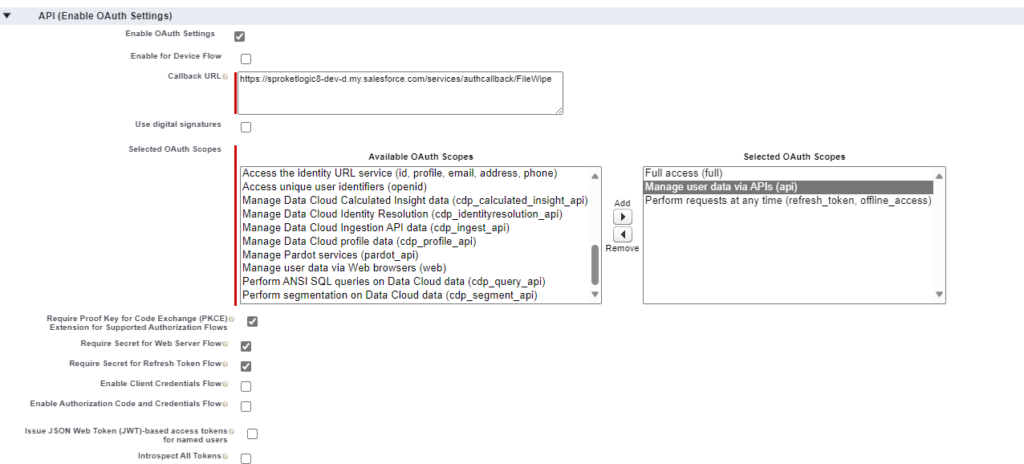
- Click on Save
- Notice the message to wait 10 Minutes
(2) Retrieve the Consume Details
In order to continue to the next step, we need to retrieve the Consumer Key and Consume Secret from the Connected App.
- click on Manage Consumer Details
- Follow the instructions to retrieve the key and secret. You will need these for the next step.
(3) Create an Auth. Provider
After creating the Connect App and retrieving the consumer key and secret, create an Auth. Provider.
- Navigate to Auth. Providers
- Click on New
- Enter
- Provider Type = Salesforce
- Enter Name
- Enter URL Suffix
- Consumer Key from the previous step
- Consume Secret from the previous Step
- Click on Save
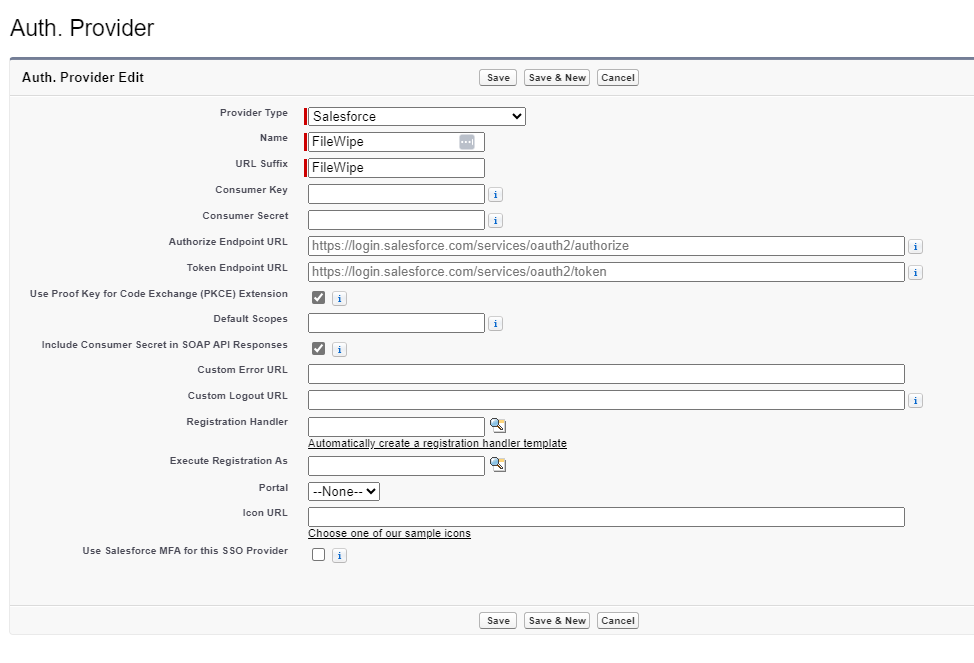
copy Callback URL
- Copy the Callback URL generated
- Navigation back to the Connected app and paste the Callback URL into the CallBack URL field
- Click Save
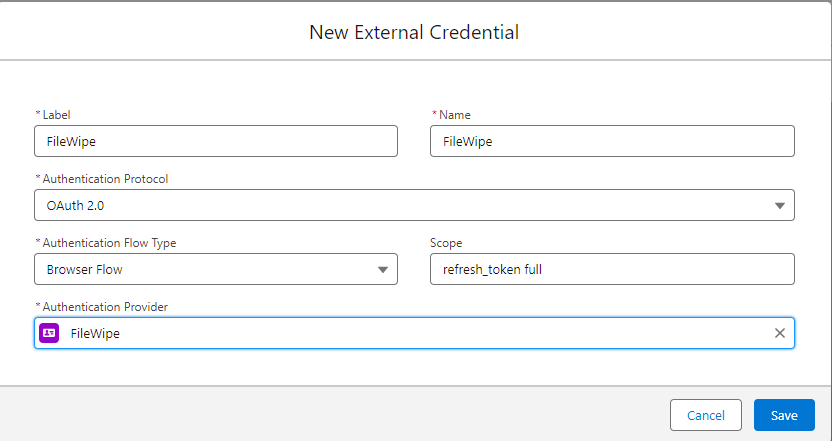
(4) Create an External Credential
- Navigation to Named Credentials

- Click On External Credentials
- Click on New
- Enter
- Label
- NAme
- Authentication Protocol as OAuth 2.0
- Scope as refresh_token full
- Authentication Provider set to the Auth. Provider created in the previous steps
- Click on Save
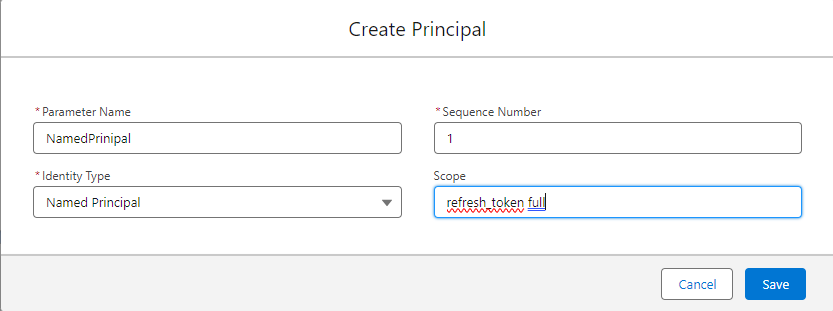
Once created, navigate to the Principals section and click on New. (In this use case, we will be setting up a single Named Principal. Your user case may require a Per User Principal).
- Enter
- Name
- Sequence
- Identity Type
- Scope set to refresh_token full
- Click on Save
For each principal created, the principal must be authenticated. Navigate to Actions and Authenticate. Follow the steps to authenticate the principal.

(5) Create an External Credential
Now we can create the named credential. Navigate to Named Credentials and click on New.
- Enter
- Label
- Name
- URL (see the Auth Provides URLs for the base URL)
- reference the External Credential created in prior steps.
- Click on Save

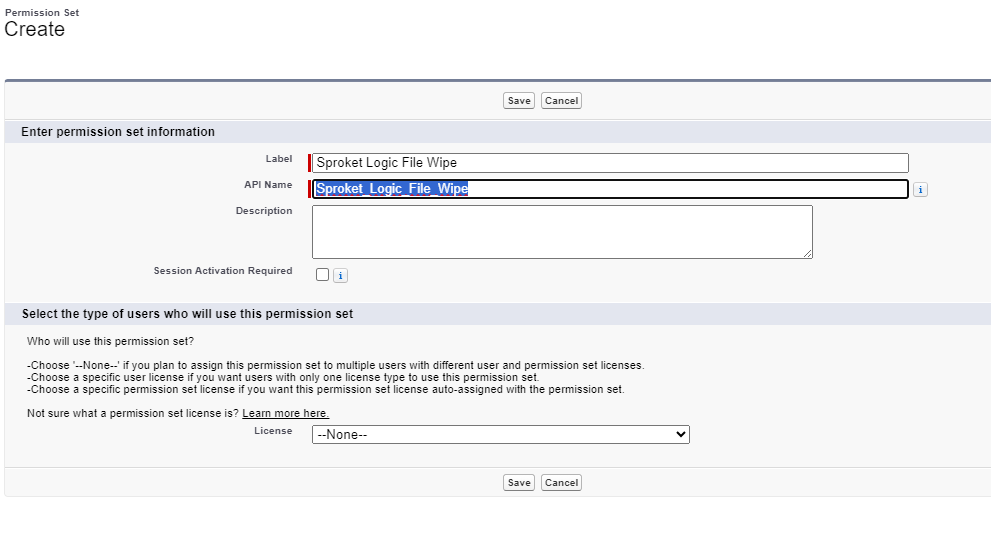
(6) Create a Permission Set
Permission to the Connected App are changed via permission sets.
- Navigate to Permission Sets.
- Click on New
- Enter
- Label
- API Name
- Click on Save
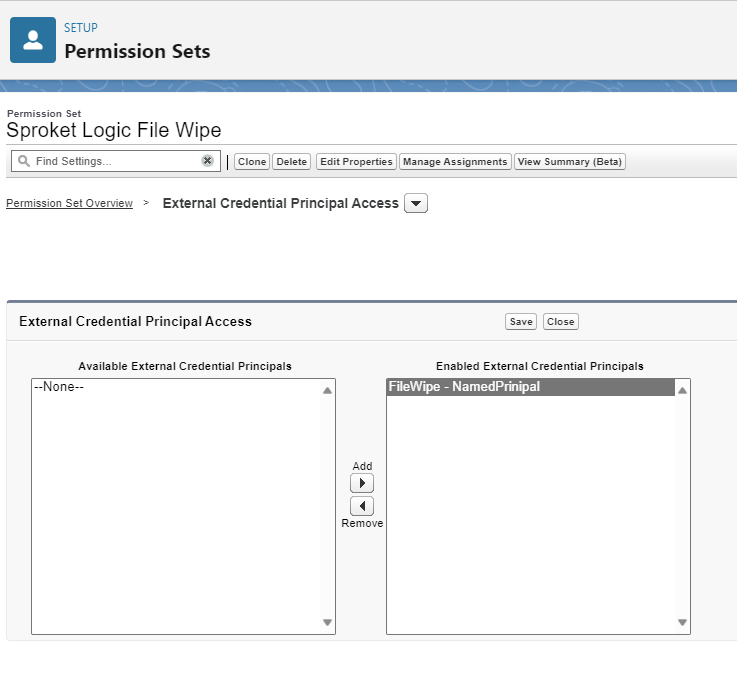
Within the newly created permission set, choose External Credential Principal Access.
- Click on Edit
- Assign the External Principal created in prior steps to the Permission set.
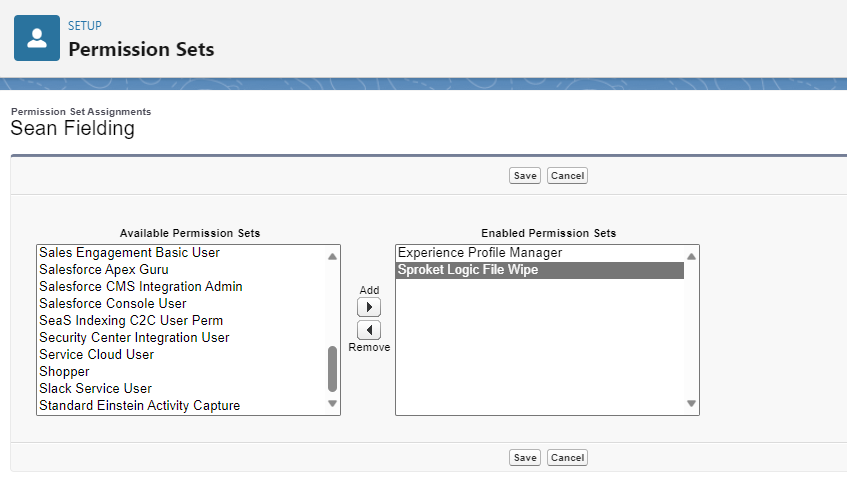
(7) Assign the Permission Set
And finally, assign the Permission Set to a user or Group.
That’s It.
That’s it. If you are following along to create a connected app, you are all set. If you are following along to configure File Wipe, please continue along.
(8) Give it a test
Let’s give it a test. If everything is configured correctly, you should be able to execute a callout leveraging the newly created named credential which returns Account data.
string query = 'SELECT ID from account';
query = EncodingUtil.URLENCODE(query,'UTF-8');
HttpRequest req = new HttpRequest();

string endPoint = 'callout:FileWipe/services/data/v59.0/query/?q=' + query;

req.setEndpoint(endPoint);
req.setMethod('GET');
req.setTimeOut(120000);

Http http = new Http();
HTTPResponse res = http.send(req);

system.debug('-----Response: ' + res.getBody());
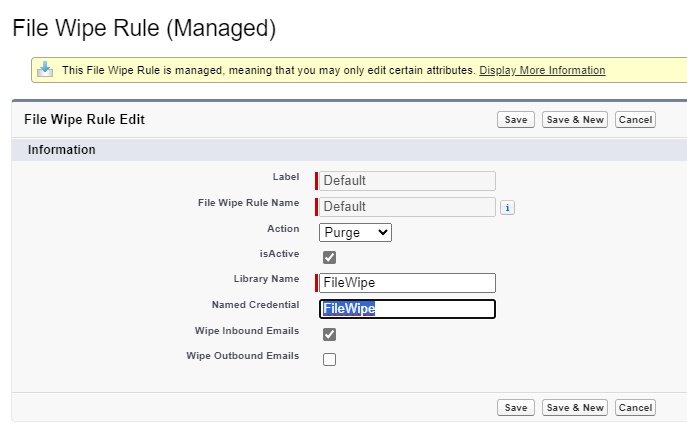
(9) Update the File Wipe Custom Metadata Type
If order to leverage the Named Credential in File Wipe, navigate to Custom Metadata Types. Locate File Wipe Rule and click on Manage Records. For the Default Rule, click on Edit.
- Set the Named Credential equal to the named credential created in prior steps.
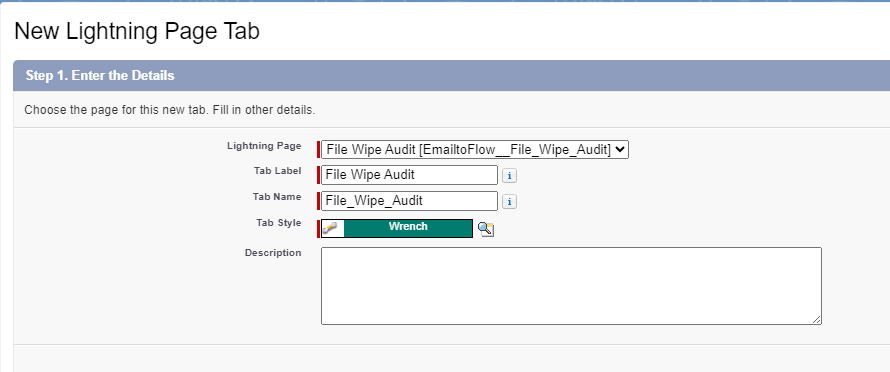
(10) Create a Lightning Page Tab
If you have not done so already, create a new lightning page tab for the File Wipe Audit.
(11) Start Your Initial Audit
Navigate to File Wipe Audit to start your initial audit. Identify re-occurring email signature and other useless files, add them to the File Wipe library, and enjoy.